Is your brickwork starting to show signs of wear and tear? Cement mortar laid between bricks may crack, crumble, or even wash away over time, thereby spoiling the appearance and compromising the structural integrity of your building. Tuck pointing resolves that all-too-common problem, adding strength to your masonry while beautifying it. Whether for the prevention of water damage or the enhancement of curb appeal, being tuck-pointed is the foremost step toward preserving the beauty and life of one’s home.
What is Tuck Pointing?
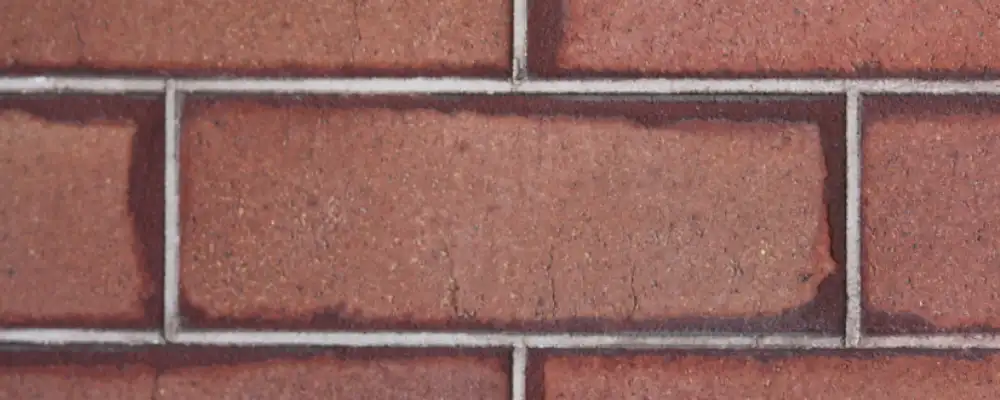
Tuck pointing refers to a masonry technique that involves the removal of deteriorated mortar between bricks or stones and replacement with fresh mortar. The name comes from an older method that used two colours of mortar to create an illusion of very fine joints between the bricks.
Although that original technique, which was purely aesthetic, is still sometimes used for restoration. Modern tuckpointing essentially repairs and reinforces the mortar joints. This is thus more relevant to preventing water from entering a structure or ensuring its long-term stability.
Purpose of Tuck Pointing
Over time, bricks or stones get eroded by weather changes, moisture, and pollution. This powdery mortar becomes susceptible to cracks, and the gaps will hinder the structure from repelling water. If neglected, this might result in:
- Internal water damage
- Growth of mold or mildew
- Shifting or dislodged bricks
- In some cases, foundation issues due to long-term moisture infiltration
Tuck pointing restores both the structural strength of the masonry and the external beauty of the building. It is especially critical in maintaining historical or commercial buildings’ authenticity and consequently the value of the structure.
Benefits of Tuck Pointing Bricks
- Prevents Water Infiltration: By properly sealing the mortar joints, the entry of moisture inside the mortar or structure can be prevented. This way, tuckpointing prevents water from seeping into the wall and acts against damage caused by the freeze-thaw cycle of water.
- Enhances Structural Stability: New mortar fills the gaps between bricks or stones, reinforcing the bond and helping to resist gross shifting, sagging, or collapse of the wall.
- Extends Masonry Lifespan: With tuckpointing, a brick can last for some decades longer by preventing severe structural issues from occurring.
- Improves Curb Appeal: Good and clean mortar joints impart a look of good upkeep to the building, which is essential for both residential and commercial spaces.
- Boosts Property Value: Well-kept brick façades convey quality to prospective buyers and investors, hence attracting a higher market price.
Signs Your Home Needs Tuck Pointing
If your brick walls exhibit any of the following, you may want to consider scheduling a tuckpointing appointment:
- Recessed or eroded mortar: Any joints that sit lower than the brick face are considered signs of weathering and erosion.
- Visible cracks or gaps: The mortar joints are broken or are missing altogether, thus weakening the structural bonds.
- Loose bricks: Any shifting or unstable bricks could well indicate loss of mortar strength.
- Moisture problems internally or externally: Water stains, mildew, or efflorescence (white, powdery deposits) all indicate ingress of moisture through faulty joints.
- Crumbles on touch: When mortar crumbles under very light pressure, it thus ceases to perform its function.
Regularly inspecting your brickwork for the above signs, particularly after bitterly cold winters or months of incessant rain, will help you nip any problem in the bud.
Tuck Pointing Tools and Materials
An exacting tuck-pointing brickwork requires precision and the right set of tools. Here is some equipment generally used by professionals:
Tools
- Tuckpointing concrete trowel – applying and shaping mortar within tight joints
- Pointing tool or jointer – for finishing and smoothing joints.
- Cold chisel and hammer – for removing old mortar.
- Angle grinder (with mortar raking bit) – for performing the removal of mortar with precision.
- Wire brush – to clean the joints before reaping.
- Mortar bag (optional) – for precise mortar application.
Materials
- Mortar mix – keep it as close to the original in composition and colour.
- Bonding agent – to enhance adhesion of the mortar (optional).
- Water and bucket – to mix and clean.
Using the right type of mortar is vital. Historic buildings more often use lime-based mortars, while modern ones mostly go for Portland cement-based mixtures.
Tuck Pointing Step-by-Step Process
Evaluation and Preliminary Works
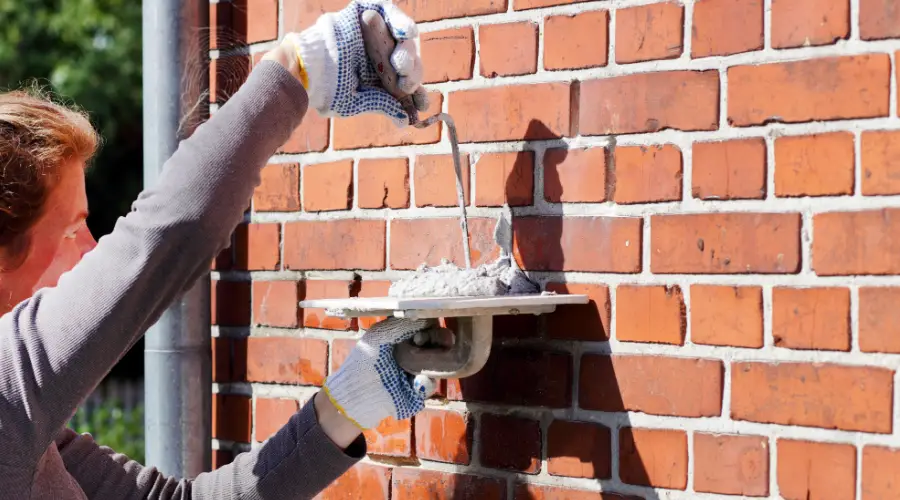
The structure is first surveyed. Areas where the mortar has cracked, recessed, or crumbled are marked. Adjacent surfaces should be covered to prevent the buildup of dust and debris. During any grinding or chiselling, one must wear protective goggles, gloves, and a dust mask, since fine dust is generated.
Remove Old Mortar
The damaged old mortar is removed using a cold chisel and hammer or by grinding with a masonry wheel to a uniform depth of about ¾ to 1 inch. One must avoid cutting into the surrounding bricks, which may otherwise be expensive to replace and, in the process, weaken the wall.
Clean the Joints
After the removal of the old mortar, the joints should be brushed thoroughly to eliminate any loose debris. Lightly seal the area with a spray bottle or a sponge. This makes the new mortar stick better and resists fast drying to produce a strong bond.
Mix and Apply Mortar
Mix a mortar that closely resembles the colour and nature of the original mortar. Using a tuck pointing trowel, press the mortar firmly into the joints horizontally first and then vertically, ensuring that each one is completely filled.
Tooling and Finishing of Joints
Once the mortar lacks plasticity but before it hardens, smooth out and shape the mortar with the jointing tool for a clean and neat finish. Wipe off excess mortar on the brick surface immediately to prevent staining.
Tuckpointing Prices Per Square Foot
The following are the major factors affecting the cost of tuckpointing brickwork for a masonry project:
Size and Complexity of the Project
For larger buildings or masonry walls, tuck pointing requires more materials, labour, and time, thereby increasing the overall cost. Moreover, structures with complex architectural designs and intricate patterns can also contribute to the project’s complexity.
Condition of the Existing Brickwork
If a masonry structure has already undergone severe deterioration, it will require extensive repair, which will considerably increase the overall restoration cost.
Pointing Technique
The choice of pointing technique impacts project cost, with methods like tuckpointing and repointing varying in application. Common techniques include flush, raked, and weather-stripped pointing. Tuckpointing often involves extra detailing for a symmetrical, aesthetically pleasing brick finish.
Location and Accessibility
The location, as well as structures in regions that experience extreme weather conditions, may demand more durable and weather-resistant pointing materials, adding cost.
Tuckpointing costs per square foot vary considerably based on region. For example, urban areas like Bengaluru or Chennai generally observe higher prices due to increased labour rates and material expenses.
The following table indicates the average cost per Square Foot based on region
| Region | Average Cost per Square Foot |
| Urban Areas | ₹960 – ₹2,000 |
| Suburban Areas | ₹800 – ₹1,600 |
| Rural Areas | ₹640 – ₹1,200 |
Tuck Pointing: DIY vs. Hiring a Professional
You can reduce the cost by taking on the tuckpointing project as a do-it-yourself (DIY) project. However, it may seem budget-friendly initially, but it is crucial to consider both the potential risks and benefits. Tuckpointing requires a set of specialised skills, tools, and masonry techniques knowledge to give proper joint finishing. Any small flaws or imperfections can lead to structural issues and costly repairs down the line.
Therefore, hire construction experts or a professional contractor. Despite the higher labour expenses, they ensure the job is done correctly and avoid costly mistakes.
Conclusion
Tuck pointing is one of the most important maintenance procedures, as it can protect one’s masonry from costly structural and water damage and preserve the aesthetic beauty. Be it a century-old historical property on the way to restoration or just a home of one’s own with some updating, the knowledge of tuck pointing itself provides the ability to make decisions concerning its repair and maintenance. Small tuck pointing applications can be handled as a DIY project; however, particularly in the case of historic structures or large damages, an emphasis should be put on hiring a qualified brick masonry professional to ensure the job is done properly and safely. When properly cared for, masonry will stand strong and beautiful for generations to come.
Frequently Asked Questions (FAQs)
What is tuck pointing?
Tuck pointing is a masonry technique that involves removing deteriorated mortar between bricks or stones and replacing it with fresh mortar.
Is tuck pointing expensive?
Tuck pointing in India is definitely not expensive, but its cost depends on different factors like the size and complexity of work, the location, whether it’s a DIY project or professional work, and the complexity of the masonry
What happens if you don’t tuckpoint?
If you fail to tuckpoint the masonry work at the right time, external moisture will infiltrate the brick walls, leading to significant issues like mold and mildew growth, structural instability, rot in timber framing, and potential foundation damage, leading to pricey repairs or a full rebuild of the affected masonry.
How often is tuck pointing needed?
There is no fixed period for the tuckpointing requirements. Observe the walls regularly. If it’s necessary due to deteriorating mortar joints, you can proceed. Typically, every 25-30 years, if the original mortar was of good quality.
How long does tuck pointing last?
If the tuckpointing for brickwork is done correctly, it can last for decades. Experts often recommend that homeowners tuckpoint every 20-25 years. It’s worth noting that tuckpointing won’t last quite as long as an original application of mortar.