
Let’s talk about something that doesn’t look like a big deal at first glance but can really mess with your construction quality – silt in sand. Most people think all sand is pretty much the same. But in reality, if you’re building anything that’s supposed to last – a home, a road, even a boundary wall construction – then tiny particles like silt can cause major problems.
That’s why we have the silt content test – a quick and simple method to check if your sand is clean enough to build with.
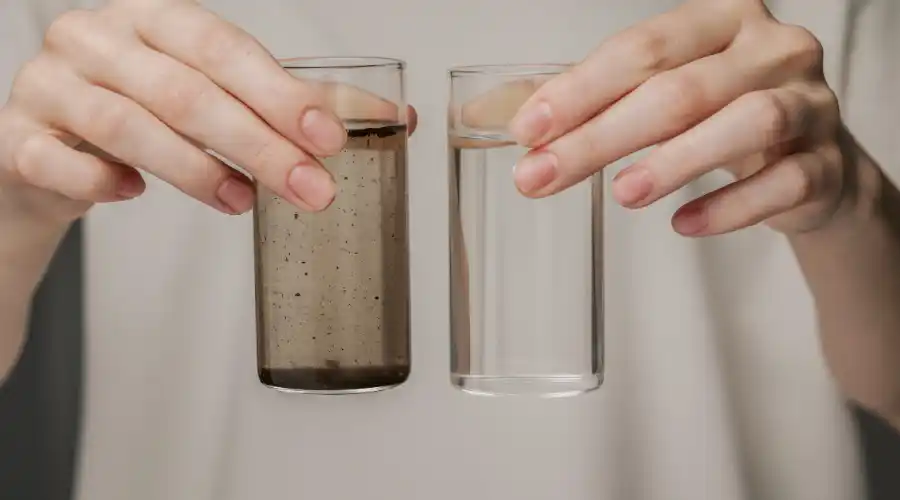
If you’re on a site, you depend on clean fine aggregates like sand for strength and stability. But when that sand is loaded with too much silt (those soft, powdery particles), things can go downhill fast. That’s exactly why construction teams are always checking sand before they mix cement or start brickwork.
In this guide, let’s walk through what the test is, why it’s important, and how you can do it yourself without needing fancy lab equipment.
What Is a Silt Content Test?
A silt content test is a basic but important check done to find out how much silt is present in sand. Silt refers to very fine particles of soil, much finer than sand, that can pass through a 75-micron sieve. Because of its special properties, Slit sand was used in various places like Brickmaking, Soil Stabilisation, etc.
However, it comes to the concrete, too much silt weakens the bond between cement and sand. It will reduce the overall strength of the structure and impact its durability. That’s why the Indian Standard IS 2386 (Part 2) indicates sand used for construction shouldn’t have more than 8% silt.
It’s one of those small things that can make or break the quality of your construction, whether you’re building a house or overseeing a commercial project.
Impact of Silt Content on Sand
You might think, “It’s just a bit of dust. How much harm can it do?” Well, here’s the answer:
- Weakens bonding:
When there’s too much silt, cement can’t properly bind the sand. The silt creates a slippery film around sand particles, preventing the cement paste from forming strong mechanical bonds. It’s like trying to stick tape on a dusty surface – it just won’t hold properly.
- Increases water usage:
Silt soaks up water, so you end up using more water in your mix. These fine particles have a huge surface area compared to sand grains, demanding extra water just to get workable concrete. This throws your water-cement ratio completely out of whack.
- Leads to cracks:
More water results in more shrinkage. As the mix dries, those shrinkage cracks start appearing in the concrete. You’ll see them spreading across surfaces like spider webs, creating weak spots that collect water and dirt over time.
- Delays curing:
Extra silt slows down how quickly your concrete sets and delayed curing. The fine particles interfere with normal cement hydration, meaning your concrete takes longer to reach design strength. This can mess up construction schedules and delay subsequent work.
- Reduces workability:
High silt content makes concrete sticky and hard to place. Workers struggle to get smooth finishes, and the mix doesn’t flow properly into corners or around reinforcement. You end up with honeycombed sections full of air voids.
- Creates surface dusting:
Concrete made with silty sand develops chalky, weak surfaces that powder under foot traffic. Within months, you’ll notice dust clouds when people walk across the floor – a clear sign of poor surface durability.
- Affects permeability:
Silt creates microscopic channels through hardened concrete, allowing water and chemicals to penetrate deeper than they should. This leads to faster deterioration, especially in harsh weather conditions.
- Causes inconsistent strength:
Testing labs report erratic compression test results when silt content is high. Some samples might meet specifications while others fail, making quality control a nightmare for project managers.
- Increases maintenance costs:
Structures built with silty sand require more frequent repairs and maintenance. What should last decades might need attention within just a few years, driving up long-term costs significantly.
- Compromises freeze-thaw resistance:
In colder climates, the extra water absorbed by silt expands when frozen, creating internal pressure that can crack concrete from the inside out.
If your sand isn’t clean, your structure might look fine on day one, but start falling apart sooner than expected. That’s why experienced contractors never skip the silt content test – they know that cutting corners on sand quality is like building on quicksand.
How to Test Silt Content in Sand?
The good news is – you don’t need a lab. Just a few basic tools and 10 minutes.
What You’ll Need:
- A 250 ml clear measuring jar or glass
- Salt water (1% table salt mixed in clean water)
- A dry sand sample
- A simple timer or phone stopwatch
Step-by-Step:
Step 1: Measure the Sand Sample: Pour dry sand into the jar until it reaches the 100 ml mark. Tap the jar gently to settle the sand and get an accurate measurement. Make sure the sand is completely dry before testing.
Step 2: Add the Salt Solution: Add salt solution until the total level reaches 150 ml (that’s 50 ml of solution added to your 100 ml of sand). Pour slowly to avoid air bubbles and ensure the solution completely covers the sand.
Step 3: Shake Thoroughly: Close the lid tightly and shake vigorously for 2 minutes. Shake in all directions – up, down, and circular motions. The water should become cloudy as silt particles get suspended in the solution.
Step 4: Let It Settle Place the jar on a flat, stable surface for exactly 2 hours. Don’t move or disturb it during this time. Any vibration can mess up the separation process.
Step 5: Read the Results: After 2 hours, you’ll see distinct layers. Clean sand settles at the bottom, with a lighter-colored silt layer on top. Measure the silt layer thickness against the total sand height. If it’s more than 8% of the total volume, your sand doesn’t meet construction standards.
Calculating Silt Content:
Silt (%) = (Height of Silt Layer ÷ Height of Sand Layer) × 100
If your result is over 8%, it’s time to find better sand or wash the current batch before using.
Factors Affecting Silt Content in Construction Sites
Not all sand is created equal. Here’s what can change its silt content:
- Source of the sand:
River sand, crushed sand, and pit sand all behave differently. River sand is usually the cleanest since flowing water naturally washes away fine particles. Crushed sand from quarries can have more dust from the crushing process. Pit sand often contains clay deposits that were mixed in during excavation.
- Weather condition:
Rainy weather can bring in more mud and dust, raising silt levels. Heavy rains wash silt from surrounding areas into sand piles. Windy conditions blow fine particles around, contaminating clean stockpiles. Even morning dew can cause dusty particles to stick to sand grains.
- Storage:
Sand stored directly on muddy ground can pick up extra clay and fine dirt. Smart contractors use concrete pads or plastic sheeting underneath their sand piles. Uncovered storage lets rain mix surface dirt into the pile, while proper drainage keeps contamination to a minimum.
- Transport conditions:
If it’s moved carelessly, sand can get mixed with other dusty materials. Dump trucks that previously carried soil or clay can contaminate fresh sand loads. Loading equipment with dirty buckets adds silt during handling. Even the route matters – dusty haul roads can coat sand during transport.
- Seasonal changes:
Monsoon seasons dramatically increase silt content in most sand sources. During dry periods, wind erosion from nearby fields ruins fine aggregates on stored materials. Spring flooding often brings extra sediment to river sand sources.
- Site contamination:
Busy construction sites generate dust that settles on sand stockpiles. Nearby excavation work kicks up fine particles that mix with stored aggregates. Traffic from heavy machinery can grind existing materials into finer particles.
- Age of stockpiles:
Sand that sits around for months tends to accumulate more silt than fresh deliveries. Older piles at the bottom often have higher contamination levels. That’s why experienced site managers use the “first in, first out” rule for aggregate storage.
Regular checks are the only way to make sure your sand hasn’t picked up silt along the way. Smart contractors test every new delivery and recheck stockpiles weekly, especially during rainy seasons
How to Interpret Silt Content Test Results
So you did the test. What now?
- 0% to 5% → It’s good. The sand is clean and safe to use.
- 5% to 8% → Still usable, but it’s on the edge. If possible, wash it first.
- Above 8% → Avoid using it unless absolutely necessary. Washing is a must.
Don’t just rely on one test – check every batch you receive. It’s easy, quick, and avoids trouble later on.
And if you’re already doing other material tests (like moisture, bulking, or sieve analysis), keep your silt data handy. It helps get a complete picture of your sand quality.
Conclusion
When it comes to building something strong and lasting, it’s the small things that count. Silt might seem harmless, but if you ignore it, your structure could end up weak, cracked, and in need of repairs.
The silt content test is so simple – a glass jar, a few minutes, and you’ll know whether your sand is trustworthy. For any builder, contractor, or site engineer, this is one of those habits that pays off in quality and peace of mind.
So before you start mixing cement or laying your first brick, take a moment, test your sand, and build with confidence.