When working with masonry, it is often the small details that create the greatest difference. Whether working with a new build or a restoration project, it comes down to techniques to enhance the beauty of brick and highlight its permanence. One such technique is recessed pointing. This is a relatively simple feature to create, yet can greatly enhance your walls by adding depth, character and charm. This article will cover what recessed pointing is, its positives, negatives, and the tools for recessed pointing.
What is Recessed Pointing?
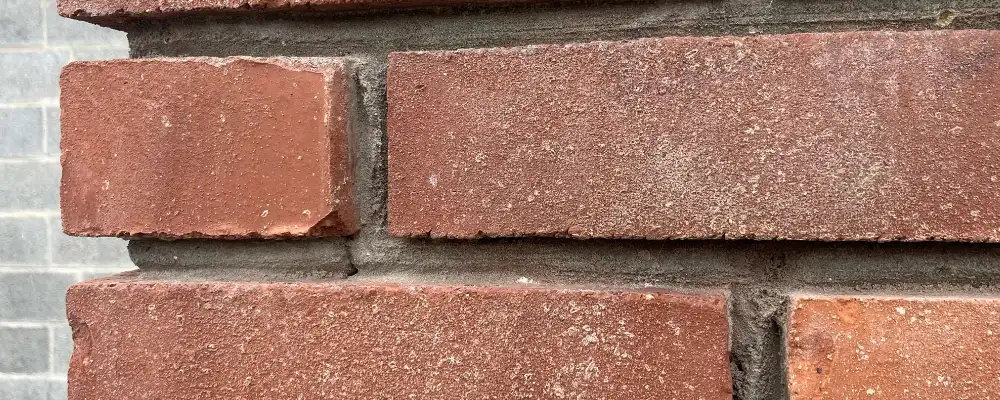
Recessed pointing is a brick masonry detailing technique in which the mortar joints are pushed back from the surface of the brick or stone. Mortar is pushed backward 3 to 5mm and therefore, instead of mortar being flush with the bricks, it creates a shadow effect that makes the bricks appear more pronounced. The shadow effect adds depth and texture to the wall, making it visually more attractive. Pointing is also used as a technique to keep water from penetrating the wall surface and causing issues like dampness and seepage.
Benefits of Recessed Pointing
- Enhances Aesthetics: One of the most common reasons for choosing to use recessed pointing is to enhance the appearance of any brickwork. The mortar lines set back just slightly create a shadow that highlights individual brick edges. This can create a uniquely textured appearance that outlines masonry construction courses and brings more character to the facade.
- Longevity: Because the mortar is recessed, there is less exposure to typical weather conditions such as rain and snow. This helps to keep rain out of the joints, which could cause damage over time. Because of this, such buildings are often better able to stand the test of time when exposed to severe weather conditions.
- Appropriate for All Designs: Recessed pointing can be used in either traditional or modern designs. It can be incorporated very well into many different styles of construction. Whether you are working on a heritage building or a new commercial project, recessed pointing has the ability to enhance a variety of styles while still continuing to enhance structural integrity.
Drawbacks of Recessed Pointing
- Risk of Water Build-Up: While recessed pointing provides some protection for the mortar joints, it could also form areas that trap water. If the mortar is recessed too far back, it could also trap moisture, leading to issues such as mold or moss growth. This concern can be significant if the pointing is not executed properly or if you are working in regions with high moisture levels.
- Manpower: Recessed pointing requires skill and precision to execute. The act of pushing back the mortar, making sure it looks uniform is labour-intensive, especially if you have large areas of brick to work with. It’s not simply slapping mortar on, but requires thought about how you’ll achieve the right look to the mortar joints.
- Not Suitable for All Bricks: Recessed pointing can look great on many bricks – but not all bricks lend themselves to this methodology. Older or softer bricks may not react well to raking and removal of mortar. In such cases, there is a risk of cracking or damage to the bricks.
Application of Recessed Pointing
There are several applications of recessed pointing, including:
- Restoration Work: Recessed pointing is a popular choice for restoring existing buildings. This technique is preferred for heritage buildings as a way of restoring old-world character in buildings.
- Architectural Elements: Recessed pointing is frequently utilised in both residential and commercial projects to enhance specific architectural elements. Whether it is stone work or an exterior facade, this technique can emphasize specific features and allow it to stand out. It provides a refined finish detailing to the building.
- Interior Surfaces: Although recessed pointing is often discussed in relation to exterior brick façades, it can also be applied on interior masonry surfaces. This has gained considerable attention, especially in homes with exposed brick, making it a desired finish in many styles of design and aesthetics.
Materials and Tools Required for Recessed Pointing
To get started with recessed pointing, you’ll need the right materials and tools. Here’s a list of what’s typically required:
Materials:
- Cement or Lime-based Mortar: Mortar is necessary for filling the joints. Lime-based mortar is usually chosen for historic buildings due to its sustainability, while cement mortar is used in modern buildings.
- Water: Clean water is needed for mixing mortar and keeping the joints moist during the curing process.
Tools:
- Pointing Trowel: A pointing trowel can be used to spread and shape the mortar. Its pointed end is ideal for pushing the mortar neatly into joints.
- Jointing Tool or Flat Iron: The jointing tool or flat iron is used to create the recessed look by pressing the newly applied mortar back into the joints after it has been applied.
- Wire Brush: Before applying the new mortar, a wire brush will be used to clean the joints and make sure all dirt and/or loose mortar is removed.
Step-By-Step Process of Recessed Pointing

Here’s a detailed guide on how to apply recessed pointing effectively:
- Cleaning the Joints – The first task to start the repointing process is to remove any old or defective mortar from the joints by using a hammer and chisel to carefully chop out portions of the mortar, while ensuring to clean the area out of as much dust, dirt, or debris as possible. This helps the new mortar adhere to the brick better.
- Preparing the Mortar – The next task is to mix the mortar to a stable yet workable consistency. The mortar should not be runny, as it will need to stay precisely within the joints, but it cannot be too dry so that workability is maintained.
- Placing the Mortar – Using the pointing trowel, carefully fill in the joints with the pre mixed mortar. Be sure each joint has been fully filled in without air pockets or holes. Don’t worry about the look yet, just get the mortar in place.
- Recessing – Before the mortar sets completely, you can use either the jointing tool or flat iron to recess the mortar inward from the brickwork by around 3-5mm.
- Final Inspection: Once the mortar has set, check the joints for any irregularities. Make any touch-ups where necessary to provide a consistent finish.
- Curing the Mortar – Now that you have placed and shaped the mortar you will want to use this time to cure the mortar. Be sure to keep the mortar moist for a few days to allow the volume to increase evenly, and to prevent the possibility of any cracks in between repairs.
Conclusion
Recessed pointing is an excellent way to improve the appearance and longevity of masonry. It is a time-consuming procedure, but will unquestionably improve the look of both new and old masonry surfaces. Provided that you follow the steps and use the right materials and tools, you can expect beautiful, long-lasting results. You should consider recessed pointing if you are trying to bring a historical building back to its previous glory, or simply trying to introduce a new dimension to your walls.