
Concrete has been a key building material for ages. As structures became bigger and more complex, engineers needed to find ways to make them stronger and more efficient. Traditional reinforced concrete works well, but it has limits. This is true for very long spans or heavy loads. This is where post-tensioning comes into play, offering a clever solution to some of those challenges.
It’s a technique used to apply compressive force to concrete after it has gained sufficient strength, allowing it to better resist tensile stress. This technique has changed our design and building methods. Now, we can use thinner slabs, create longer spans, and have more open spaces in buildings. Understanding post-tension concrete is key to appreciating many modern structures around us.
What is Post-Tension Concrete?
Post-tension concrete is concrete that’s been given a tight compression after it’s been poured and has started to harden and gain sufficient strength. This method uses high-strength steel cables, known as tendons. They are threaded through ducts in the concrete, unlike just relying on steel bars (rebar) placed beforehand.
Once the concrete has gained enough strength, these tendons are pulled tight using hydraulic jacks, and then they’re anchored at the ends. This pulling action compresses the concrete. It helps resist tensile forces that usually cause cracks. The belt holds them all together, making the whole stack much stronger and less likely to fall apart.
This technique has been around for a while, gaining real traction in the construction world since the mid-20th century. It’s particularly useful for creating longer spans and thinner slabs, which means more open spaces and less material needed. It’s a game-changer for modern construction. It enables impressive structures that traditional reinforced concrete can’t achieve.
How Does it Differ from Traditional Concrete?
| Core Aspects | Traditional RC (Reinforced Concrete) | Post-Tensioned Concrete |
| Steel Placement | Before concrete pour | After the concrete pour (tendons in ducts) |
| Stress Applied | Passive (resists tension) | Active (compresses concrete, then resists tension) |
| Typical Slab Thickness | Generally thicker | Can be thinner for the same span |
| Crack Prevention | Relies on rebar | Actively reduces cracking through compression |
| Deflexion | More prone to deflexion | Less deflexion due to active compression |
While both methods utilise steel to enhance concrete’s performance, post-tensioning provides a more advanced approach to managing stresses within the structure. It allows for more efficient use of materials and can lead to more slender and aesthetically pleasing designs, which is why one sees it in so many modern buildings and infrastructure projects. It’s all about making concrete work smarter, not just harder.
Applications of Post-Tension Concrete
- High-Rise and Open-Plan Buildings
- Post-tension slab is invaluable for tall buildings and those with large open spaces.
- Multi-storey car parks, for example, require wide spans without many columns. Post-tensioned slabs enable thinner floors and require fewer columns, which increases usable space and lowers the overall building height.
- Commercial and residential buildings benefit from fewer load-bearing walls, giving architects greater freedom.
- Modern Bridge Construction
- Bridges are a prime example where post-tensioning excels. It allows fewer supports and longer spans for elegant, cost-effective designs.
- Segmental bridges are built in sections connected by post-tensioned cables.
- Cable-stayed bridges’ post-tensioning stiffens the concrete deck.
- Box girder bridges have hollow sections strengthened with post-tension tendons.
- Advanced Slab-on-Ground Solutions
- Post-tensioning enhances slabs, particularly on expansive soils that expand and contract with changes in moisture.
- Compressive forces resist soil movement, preventing cracking and providing stable foundations for residential and commercial buildings.
- Other Practical Uses
- Nuclear containment ensures safety with strong, durable concrete.
- Stadiums and grandstands enable large cantilevers and unobstructed views
- Offshore platforms meet marine environment durability demands
- Water tanks and silos withstand outward pressure to help prevent cracking.
Different Types of Post-Tensioned Concrete
Each method has its quirks and is used for different reasons, depending on the building’s needs. Understanding these differences is crucial to recognising why post-tensioning is so effective in construction. It’s all about how the steel tendons, which are the real muscle of the system, interact with the concrete itself. Post-tensioned concrete is categorised into two main types,
1. Bonded Post-Tensioned Concrete
With bonded post-tensioned concrete, the tendons are placed inside ducts within the concrete. Once the concrete has been poured and has gained enough strength, these tendons are stressed or pulled tight using hydraulic jacks.
After they’re stressed to the right tension, the ducts are filled with a cementitious grout. This grout fills all the gaps around the tendons, creating a really strong bond between the steel and the concrete.
This bond means that the tendons and the concrete act as a single unit, sharing the load and working together to resist forces. The grout protects the tendons from corrosion, which is a big plus for long-term durability. It also aids in distributing stress more evenly across the entire concrete structure. If a tendon were to break, the bond would prevent it from retracting completely, limiting potential damage.
2. Unbonded Post-Tensioned Concrete
Unbonded post-tensioned concrete works a bit differently. In this method, the steel tendons are coated with grease and enclosed in a plastic sheath before being embedded in the concrete. This sheath stops the concrete from bonding directly to the tendons. Similar to bonded systems, the tendons are tensioned after the concrete has hardened.
However, because there’s no grout, the tendons are free to move slightly within their sheaths. The tension is held in place by anchorages at the ends of the concrete element. The greased sheath allows the tendons to move independently, which can be useful for certain structural designs.
Installation can sometimes be quicker and simpler compared to grouting. It offers more flexibility for future modifications or repairs as individual tendons can be re-stressed or replaced if needed.
Advantages and Disadvantages of Post-tension Concrete
Major Strengths
- Reduced Material Usage
Because post-tensioning makes the concrete more efficient, you often need less of it. This means thinner slabs and beams, which can save a fair bit on concrete and reinforcing steel. Less material usually means less cost, which is always a bonus.
- Longer Spans and Fewer Columns
With post-tensioning, you can create much longer spans between supports. This reduces the need for lots of internal columns, giving architects and designers a lot more freedom. It allows for more open and flexible architectural designs, which is a huge plus for modern buildings.
- Faster Construction
Post-tensioning can speed things up. Because you might have fewer columns and thinner slabs, the overall construction process can be quicker. Less concrete to pour, less formwork to set up, and so on.
Drawbacks
- Higher Initial Cost
While it can save money on materials in the long run, the initial setup for post-tensioning can be more expensive. You need specialist equipment, and the tendons themselves aren’t cheap.
- Specialised Labour Required
This isn’t something your average builder can just knock up. Installing post-tensioning systems requires highly skilled and experienced workers. If it’s not done right, you could end up with serious problems, which brings us to the next point.
- Corrosion Risk
The steel tendons inside the concrete are susceptible to corrosion if they’re not properly protected. If water or chlorides get in, it can lead to the tendons failing, which is a major structural issue. Proper encapsulation and grouting are vital to prevent this.
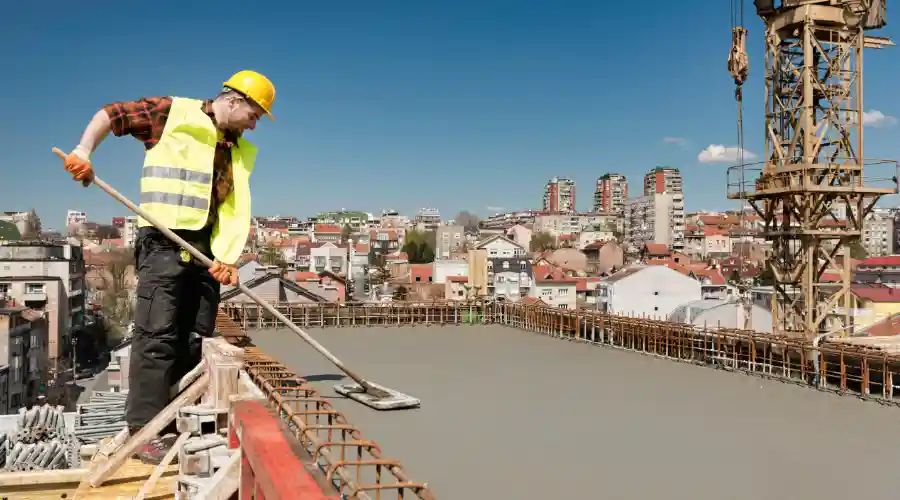
How is Post-Tension Concrete Implemented?
To keep everyone safe, there are some non-negotiable rules.
- Firstly, only trained and certified personnel should handle post-tensioning work. This isn’t a DIY project.
- Secondly, you need to have a clear, detailed plan for every step from stressing the tendons to grouting them. This plan should include specific safety protocols and emergency procedures.
- Regular inspections of equipment are also vital – you don’t want a faulty jack or anchor failing under pressure.
- Always wear appropriate personal protective equipment, which includes hard hats, safety glasses, and heavy-duty gloves. Set exclusion zones around stressful operations to keep bystanders safe.
- Conduct regular inspections and calibrations on all gear, such as jacks and Concrete pumps. Follow the manufacturer’s recommendations for all materials and equipment.
- Never attempt to cut or modify tendons without proper instruction and a clear list of safety precautions to follow.
How Does Post-tension Concrete Work?
A series of the following main steps is present in post-tensioning,
1. Duct Installation
The contractor drills and places plastic or steel ducts inside the formwork of the concrete, then the steel tendons are threaded through them (tendons are the rods or strands) before the concrete is poured.
The ducts are carefully positioned in the correct locations before the steel rods are inserted into them.
2. Concrete Pouring
The concrete is poured into the formwork and allowed to cure to the preferred strength level, while the tendons remain slack.
3. Tensioning
The concrete is left to set until it reaches the desired strength. Then, the tendons are stress-applied through a hydraulic jack from either or both ends, creating high tension.
4. Anchoring
The tendons in high-tension form are anchored into the concrete, making both components be in compression.
5. Vertical Direction
The primary purpose of pre-stressing is to create internal compression in the concrete of sufficient intensity to resist externally applied loads.
Post-Tension vs. Pre-Tension
| Functionality | Pre-Tensioning | Post-Tensioning |
| Timing of Stress | Before concrete hardens | After the concrete hardens |
| Position | Typically, in a prefabrication plant | Typically on-site |
| Bonding | Achieved through a bond with concrete | Achieved through anchorages, often grouted ducts |
| Component Dimensions | Suited for smaller, standardised elements | Suited for larger, complex, or continuous elements |
| Adjustability | For custom shapes, it is less flexible | Highly flexible for various designs |
| Tools | Requires stressing beds | Requires hydraulic jacks, anchorages, and grouting equipment |
Ultimately, the choice between these two methods is a design decision based on a thorough analysis of the project’s specific needs and constraints.
Conclusion
Post-tension concrete is not just a fancy building trick; it actually makes structures stronger and last longer. We’ve examined how it works, its benefits, and some key considerations to be aware of. It’s clear that when done right, with good planning and skilled personnel, post-tensioning is a game-changer for all sorts of buildings. It helps create those big open spaces we see everywhere these days, and it’s a big part of modern construction.