Masonry structures are the best proof of time, and buildings that are centuries old continue to show an impressive level of durability. Behind all this is the unnoticed thing: pointing. Of all the pointing methods, grooved pointing has become extremely popular for both structural protection and aesthetic appeal. This method entails purposefully making both functional and decorative indentations in mortar joints.
Whereas conventional pointing serves only to fill joints flush with the surrounding brickwork, grooved pointing elevates brick masonry finishing to a higher level by producing characteristic patterns that are not only aesthetically pleasing but also offer superior weather protection. This article examines the technicalities, advantages, and functional uses of grooved pointing for any masonry maintenance or restoration enthusiast.
What is Grooved Pointing?
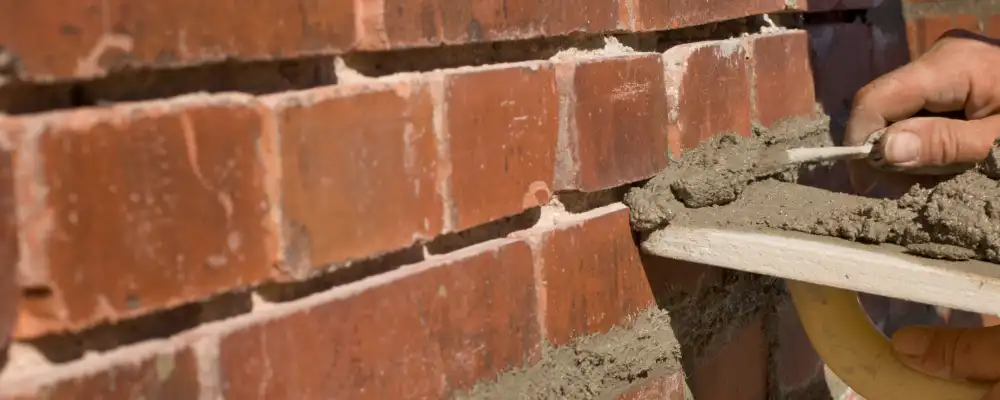
With grooved pointing, a little concave groove is used to complete the mortar joint between bricks or stones. This groove is made using a jointer tool after the mortar is applied and still soft. While it adds a neat, decorative finish, its primary function is to help rainwater drain off more efficiently, reducing water penetration and moisture-related damage.
You’ll see grooves pointing in many exterior walls, especially where weather protection matters. It’s also used in heritage buildings for its neat appearance. This method not only improves how the wall looks but also adds to its overall durability by keeping moisture away.
How Grooved Pointing Works?
It works by creating a shallow groove in the top layer of cement mortar. After the bricks or stones are set in place and the mortar has had a little time to settle, fresh mortar is added to the joints. A groove is drawn in the middle of this mortar using a metal jointer while it is still workable.
This groove helps water slide off the wall, reducing the chance of it soaking into the structure. Over time, this simple detail can prevent big problems like damp patches, mould, or cracks. The groove also gives the wall a smooth and even look, especially helpful in restoration projects where the finish must match older styles.
Advantages of Grooved Pointing
- Water protection– The groove lets water drain easily, which prevents moisture from settling into the wall.
- Neat finish– It gives walls a clean and professional appearance.
- Stronger joints– Proper compaction during grooved pointing improves joint strength.
- Good for restorations– Helps match old buildings where neat, decorative joints were common.
- Lower maintenance– Well-finished grooves don’t wear out quickly or trap debris.
- Better weather resistance– Ideal for buildings in areas with frequent rain or damp conditions.
- Practical aesthetics- Grooved pointing is a practical choice when you want both performance and appearance. The added effort during installation brings long-term benefits to any brickwork.
Step-by-Step: Grooved Pointing Procedure
1. Surface Preparation
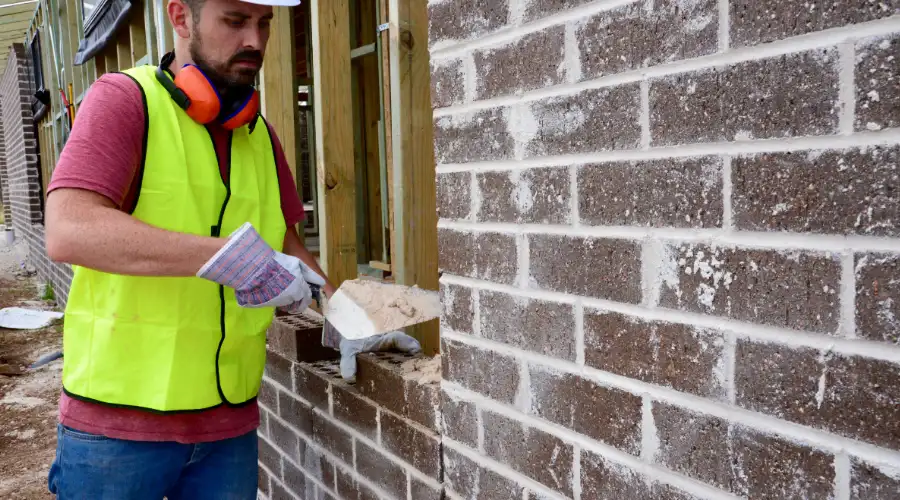
Grooved pointing begins by raking out loose or old mortar to 15–20 mm with a raking tool or an angle grinder with a mortar raking disc. Take great care not to ruin the surrounding bricks. Clean the joints with a brush and lightly dampen them after raking to prevent loss of moisture from the new mortar.
2. Mixing the Mortar
Produce mortar in a concrete mix ratio of cement or lime and sand of 1:2 or 1:3. The consistency should be stiff but not wet so that it holds when grooving.
3. Filling the Joints
Tightly press the mortar into the joints using a pointing concrete trowel with no air pockets. Firm packing is imperative to produce strength and durability.
4. Forming the Groove
When the mortar is firm but still pliable, use a pointing key or jointer to create a central groove. This must be done at the appropriate time—too early results in smearing, too late results in cracking.
5. Finishing and Curing
Let mortar set slightly, and then clean edges with a soft brush. Leave the work covered for 24 hours, out of the way of moisture or direct sunlight. In dry conditions, mist with water to avoid shrinkage cracks in the curing process.
Materials and Tools for Grooved Pointing
Materials:
- Cement or lime-based binder, depending on the building type
- Well-graded sand for proper consistency
- Lime-rich mortar for traditional or heritage structures
- Clean water for mixing
- Color-matched mortar if aesthetic matching is required
Tools:
- Mortar raking tool or joint raker for removing old mortar
- Angle grinder with appropriate blade for deep or stubborn mortar removal
- Pointing trowels in various sizes for applying new mortar
- Pointing keys or grooved jointers to shape uniform grooves
- Jointers in multiple profiles to achieve specific groove shapes and depths
- Soft brush for final cleaning and removing excess mortar
- Mixing tray or bucket for preparing mortar
- Spray bottle or water brush for dampening joints before pointing
Safety Equipment:
- Protective gloves to prevent skin irritation
- Safety goggles or spectacles to shield the eyes from debris
- A dust mask or respirator to avoid inhaling mortar dust
- Hearing protection if using power tools like grinders
Using the correct combination of materials and tools ensures durability, finish quality, and safety during grooved pointing work.
Cost Consideration of Grooved Pointing
The cost of grooved pointing depends on factors like area size, wall condition, mortar type and labour rates. Restoration work may be more expensive due to careful matching and manual labour.
While it may cost slightly more than regular pointing, the durability and appearance often justify the price. It’s worth hiring skilled workers who understand the importance of timing and finishing. Remember, the upfront investment in good pointing saves a lot in future repairs and water damage control.
Groove Pointing vs Traditional Pointing
Here’s a simple and clear comparison table showing the difference between Grooved Pointing and Traditional Pointing.
| Feature | Grooved Pointing | Traditional Pointing (Flush/Weatherstruck) |
| Water Resistance | Directs water away using a groove, reducing water penetration | Flush pointing doesn’t shed water well; weatherstripping helps a bit |
| Exposure to Weather | Less surface exposed to weather, reducing freeze-thaw damage | More surface exposed, making it prone to wear |
| Skill Level Required | Needs more precision and care | Easier and quicker to apply |
| Time to Apply | Takes 20–30% longer due to groove shaping | Faster and simpler to complete |
| Best Use Cases | Ideal for outer walls and harsh weather zones | Suitable for sheltered or indoor walls |
| Visual Appeal | Creates neat shadow lines and enhances the brick pattern | Gives a flat, smooth finish |
Conclusion
Grooved pointing is a smart way to enhance both the durability and appearance of masonry walls. The recessed finish helps in shedding rainwater, reducing moisture penetration and long-term damage. Though it requires skilled application, the results offer lasting value and a refined look. Whether for new construction or restoration, grooved pointing adds strength and visual appeal to any structure.