When it comes to home or building maintenance, caulking is always at the top of the list because it seals air, water, and dust out of a home. It is commonly used as thermal insulation for roofs as well as to keep moisture from entering the home.
This blog will help you learn everything you need to know about caulking, whether you’re new to the world of home improvement or a seasoned DIY pro. We will also talk about key tools for caulking and what to avoid if you want a perfect finish that lasts the test of time.
What Does Caulking Do and Why Is It Important?
Caulk is a flexible, waterproof material that is used to fill up empty spaces, structural cracks, and joints on things like wood, glass, metal, and concrete. It is a very important thing in stopping air, water, dust, and pests from entering buildings.
Caulking applied around the edges of windows, doors, plumbing systems, and other surfaces is a sure way of getting rid of heat leaks and switching to a more energy-efficient option by insulating lightly and sealing the cracks and drafts.
Such caulks as silicone, acrylic, or polyurethane are temperature change reactive, and the best choice in terms of selecting materials. These fillers’ properties allow for any contraction and relaxation of the building throughout the year.
The shrinkage and expansion of the caulking lead to its capability of serving as a good water repellent, hence saving a structure from the threats of dampness and mold. Additionally, caulking helps improve a building’s structural integrity and extends the lifespan of its materials by preventing environmental elements from penetrating the structure.
Types of Caulking and Their Uses
The five main types of caulking, along with their uses, are,
1. Acrylic Latex Caulk
Typically made from a combination of acrylic resins, water, and fillers. Most suitable for inside spaces, such as sealing leaks in the gaps around the windows, trim, and drywall.
Pros: Easy to put on, clean, and coat with other paint.
Cons: But it can get damaged due to water; for that reason, it is not as good as it used to be, and it may also leave cracks in case it gets too old.
2. Silicone Caulk
Composed of silicone polymer, often with fillers like silica, and curing agents. Most useful for wet areas, e.g., kitchens, bathrooms, and near the windows.
Pros: It’s flexible, waterproof, and it lasts longer than usual.
Cons: Silicone caulk cannot be painted, and cleaning the surface may require a solvent-based cleaner to remove dirt and debris.
3. Polyurethane Caulk
Made from polyurethane resins, additives, and curing agents. This is applied both in indoor situations and in outdoor ones, more particularly on materials such as concrete, masonry stones, and places where the need for strong adhesion arises.
Pros: It has achieved strong adhesion, it is a good product to sell in terms of weather resistance, and you can use it for painting.
Cons: It’s hard to remove stains, dries very slowly, and you may have to endure the exhausting job of cleaning up the mess.
4. Vinyl Latex Caulk
Vinyl latex caulk is made from a blend of vinyl resins, latex polymers, and water. It is widely used to fill the gaps towards siding and windows to prevent water from getting inside the house.
Pros: The product is capable of withstanding different weather conditions, and it also gives you the freedom to bend and twist it/like the color you want.
Cons: Vinyl latex caulk tends to be less flexible compared to silicone-based alternatives.
5. Butyl Rubber Caulk
Butyl rubber caulk is made from butyl rubber, a synthetic rubber known for its high waterproofing capabilities.
Pros: Excellent adhesion, long-lasting, and moisture-resistant.
Cons: Can be difficult to apply, and has a sticky texture.
Top Advantages of Caulking
Caulking provides several key benefits that enhance the performance and longevity of your home or building.
- Increasing Energy Savings
Caulking is the process that seals the gaps and cracks around windows, doors, and other openings, thereby reducing air leaks. It is a significant aspect in which the heating and cooling costs are reduced due to the insulation effect created and the stable temperature maintained.
- Moisture Control
The waterproofing of the cracks and gaps is what caulking represents; thus, it is the first line of defense against water infiltration that may adversely affect the surfaces of the building (walls, ceilings, foundations) and lead to either mold formation or their destruction, basically in basements and bathrooms.
- Enhanced Comfort
Through the process of gap sealing, caulking is a way to achieve a more comfortable indoor environment, one that is free from cold drafts in winter and one where cooler air is trapped during the summer.
- Effective Pest Prevention
Caulking that is applied to the entry points seals off insects, rodents, and other pests, preventing them from entering the house through cracks in the walls or around plumbing fixtures.
- Aesthetic Improvement
Caulking is the key material that gives an orderly, smooth, and neat finish around windows, doors, trim, and baseboards. Thus, it is responsible for ensuring that the aesthetic appeal of the interior or exterior is perfect, with no gaps that can spoil it.
- Noise Control
Using a caulking gun is one of the best ways to eliminate gaps that produce noise and thus, you will sleep without any noise bothering you in the house, or a noise-free office.
- Cost-Effective Maintenance
Regular caulking can avert the necessity of more costly repairs as it fixes the little problems before they become bigger ones that imply higher prices.
Essential Applications of Caulking
Caulking is utilized in construction and home repairs. Presented below are some examples of how caulking is normally applied.
1. Windows and Doors
One of the most common applications of caulking is around windows and doors, where it fills small gaps and seals joints to prevent drafts, water intrusion, and energy loss. This not only enhances the building insulation but also helps maintain consistent indoor temperatures.
2. Bathrooms and Kitchens
Caulking is used in areas with high humidity, such as bathtubs, showers, and sinks, to waterproof joints and prevent water from seeping behind the fixtures.
3. Plumbing
The primary importance of caulking is to seal the pipes and fixtures installed on walls, floors, or ceilings, thereby preventing water and air leaks.
4. Exterior Gaps and Cracks
When you use caulking outside of your home, it is called ‘exterior caulking’. It is utilized between the building siding, trim, and masonry to fill gaps and thus avoid water infiltration, and at the same time prevent pest intrusion.
5. Roofing and Gutters
Via caulking, one can fill joints, the exposed parts of a roof where water is most likely to enter, and gutters to ensure water does not seep through the roof.
6. Baseboards and Trim
Caulking is mainly put at the sides of baseboards, crown molding, and other trims to give them an aesthetic and sealing function in addition to preventing the entry of air or dust through the gaps.
7. Flooring
Caulking is applied along the edges of flooring and, in particular, to certain areas with high moisture levels, such as bathrooms and kitchens, to eliminate the chances of water penetration.
Step-by-Step Instructions for Caulking

Step 1: Prepare the Surface
Use a cloth to clean the surface area where you will be doing the caulking. Get rid of any dust, old caulk, any peeling paint with the help of a scraper or a wire brush. Make sure that the surface is completely dry and smooth, so the adhesion will be perfect.
Step 2: Trim the Caulk Tube
To cut a caulk tube, a utility knife is used. The angle should be 45 degrees. The opening of the tube should be of the perfect size to be compatible with the actual filling of the space.
Step 3: Set Up the Caulk Gun
The caulk tube should be placed in the caulk gun. The plunger is pushed to get the desired size of the tube in place.
Step 4: Fill the Cracks with Caulk
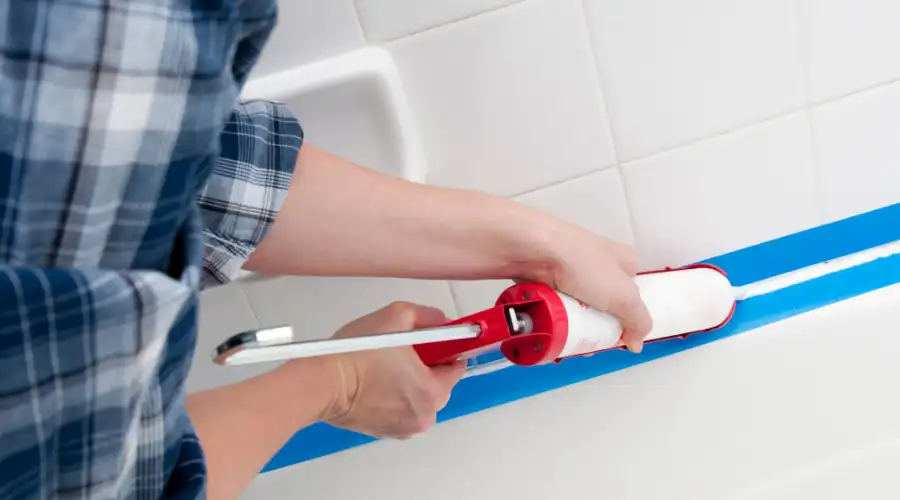
Start at one end of the crack and gently press the trigger of the caulk gun, allowing the caulk to emerge in a single, unbroken line. Now, slowly squeeze the gun from side to side to make the caulk apply evenly.
Step 5: Level the Caulk
Make use of a caulk smoothing tool or simply your finger to smooth out the caulk. Try your best to create the most uniform and neat result possible.
Step 6: Clean Up
If the caulk is more than needed, first, take a damp cloth and wipe away the excess caulk in the next step. Always follow the curing time as per the manufacturer’s guidelines.
Best Tools and Techniques for Caulking

Here’s a list of essential caulking tools and techniques for a successful application,
- Caulk Gun: A tool used to dispense caulk from a tube, allowing controlled application.
- Caulk Tube: The container holding the caulking material, usually in a squeezable tube.
- Utility Knife: Used to cut the tip of the caulk tube at an angle for precise application.
- Smoothing Tool: Helps smooth out the caulk after application for a clean, even finish.
- Painter’s Tape: Used to mask areas around the caulking site for cleaner lines.
- Wet Cloth or Sponge: To clean excess caulk before it dries.
- Caulk Removal Tool: For scraping off old or dried caulk.
These tools and techniques ensure a professional, long-lasting caulking job.
Mistakes to Avoid When Caulking
- Any grime or mold found on the surfaces should be removed, and this will ensure that the caulking properly adheres to the wall and that the finished product looks good.
- Without following the proper technique for cutting a sealer tip, even experienced individuals may produce inconsistent bead sizes, affecting the quality and appearance of the caulking application.
- If you apply caulk to surfaces that are still wet or moist, it will prevent proper adhesion and may even cause the caulk to fail eventually.
- Failing to smooth the caulk on the surface after its application will cause problems, including the caulk’s appearance to be unsightly and the finish not to be even.
- Applying lots of such material to too wide a gap may cause the whole area to look too much and very noisy and dishevelled.
- Not being able to clean the excess caulk immediately and then allowing it to dry will result in twice the work of cleaning, leaving the surface unattractive.
Conclusion
Caulking is an essential task for maintaining the energy efficiency, comfort, and structural integrity of your home. By understanding the various types of caulking, selecting the appropriate tools, and applying the correct techniques, you can achieve professional-grade results.
Regular caulking maintenance helps prevent water infiltration, reduces energy costs, and enhances the overall appearance of your home. Taking the time to do it right will provide lasting benefits for years to come.

