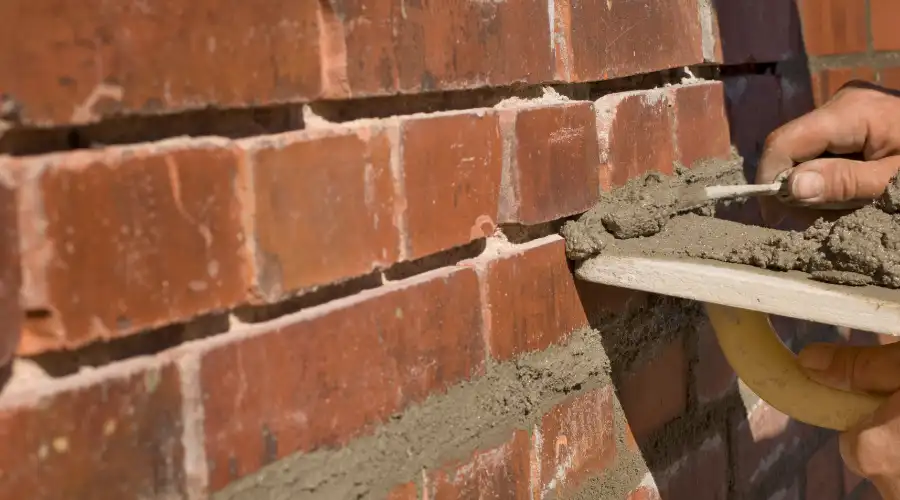
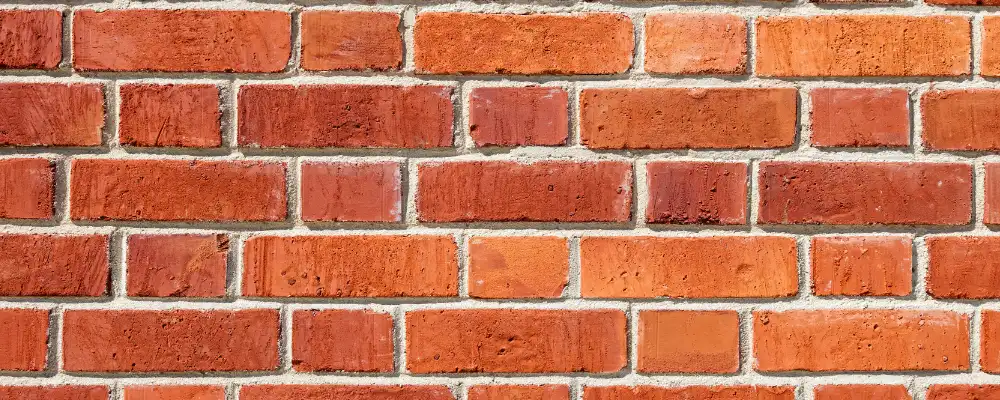
Struck pointing is one of the common techniques used in brick masonry construction to make joints in brick or stone more durable and aesthetically pleasing. Of various pointing techniques, struck pointing is special in appearance as well as functional benefits. In struck pointing, a neat and sloping finish is created that not only makes the brickwork visually more attractive but also provides greater resistance against weathering.
With continuous urbanization and dilapidated buildings requiring repair, it would be helpful for both property owners and architects to know about struck pointing. This manual explains the intricacies of struck pointing, ranging from fundamental concepts to practical applications, providing you with the knowledge you need to know and implement this ancient but still-relevant masonry method.
What is Struck Pointing?
Struck pointing is an old finish masonry method in which the mortar joint between stones or bricks is pressed down and sloped with a special concrete trowel. This slope allows rainwater to flow off the surface with ease, lessening the amount of water penetrating the wall.
It is commonly achieved by pressing and forming the joint using a pointing trowel. The top edge sits level with the brick surface, and the bottom edge of the joint is slightly deeper. The slight angle stops water from piling up and shields the structure. Struck pointing is used in exterior brickwork for its drainage advantage.
Application Struck Pointing
Struck pointing is commonly applied in residential and commercial masonry works, particularly those exposed to rain and moisture. This pointing style is generally observed in boundary walls, brick facades, garden walls, and retaining walls.
It’s also utilized in the restoration of heritage buildings where adequate water runoff is required without detracting from the visual appearance. Struck pointing works for clay bricks, cement blocks, and natural stones utilized in exterior applications.
Because it minimizes water penetration, it is also utilized in buildings near coastal or high-rainfall areas. The technique may be used in new construction or repair where aged mortar joints need to be replaced or repaired for structural purposes.
Benefits of Struck Pointing

Several benefits of struck pointing are as follows,
- Better Drainage of Water: The sloped shape of the joint helps water flow off quickly, reducing the chances of water seeping into the wall.
- Better Aesthetic Value: It provides a neat, crisp finish that maximizes the aesthetic appearance of brick or stone walls.
- Improved Toughness: By avoiding water intrusion, it prevents freeze-thaw erosion and reduces joint weathering.
- Low Maintenance: It needs little maintenance once it is properly applied and can last many years.
- Insulates Internal Wall Structure: Averts internal damp, mould, or decay from water penetration.
- Pliable for Restoration Work: Facilitates the restoration of old buildings without distorting their original appearance.
- Long-term Cost-effective Solution: Provides long-term protection and minimizes repair expenses over the years.
Tools & Materials Required
- A pointing trowel with a thin blade is used for accurate mortar application.
- A jointer tool helps create angled or recessed finishes in the joints.
- A brick jointer is used specifically for finishing vertical joints.
- A mortar hawk holds and carries small amounts of mortar during application.
- A margin trowel is useful for mixing and handling small quantities of mortar.
- A soft brush is needed to clean off excess mortar from the brick surface.
- A spray container is used to moisten the joints before applying mortar.
- Gloves, safety goggles, and dust masks are required for personal protection during the work.
- The mortar mix should match the original in strength and composition, usually made of lime, cement, and fine sand.
Struck Pointing Procedure – Step by Step
1. Surface Preparation
Begin by removing the existing mortar from the joints to a uniform depth of 15–20 mm using a chisel or grinder. This creates enough space for the new mortar to adhere properly. Clean the joints thoroughly using a brush to eliminate dust, loose particles, and debris.
2. Joint Damping
Lightly moisten the cleaned joints using a spray bottle or water brush. This prevents the dry masonry from absorbing water from the new mortar, which could lead to premature drying and weak bonding.
3. Mortar Mixing
Prepare a mortar mix that closely matches the original structure. A typical mix includes cement, lime, and fine sand in the correct ratio to suit the type of masonry being worked on.
4. Mortar Application
Using a pointing trowel, carefully fill the mortar into the prepared joints. Ensure full compaction of the mortar with no air gaps. Begin with horizontal joints followed by vertical joints.
6. Struck Finish Formation
When the mortar is firm but still workable, use a jointing tool to draw along the top edge of the horizontal joints at a 45° downward angle. Vertical joints are left flush or slightly recessed.
7. Finishing and Curing
Brush away excess mortar gently and mist the pointed area lightly with water for the next few days to ensure proper curing and strength development.
Maintenance Tips for Struck Pointing
Regular Inspection
Struck pointing requires periodic maintenance that begins with regular visual inspections, particularly after extreme weather conditions. Inspect for cracks, erosion, or powdery and detached mortar areas. Clean the mortar joints regularly with a soft brush to eliminate surface dirt and avoid vegetation growth that may weaken joints.
Seal and Repair Minor Cracks
Never power wash, which can wear away mortar and drive water deep into joints. Repair minor cracks with suitable mortar repair materials early on before they develop. Seal exposed areas in exposure locations with breathable masonry sealer to give an added layer of protection while still permitting moisture to escape.
Provide Good Drainage and Record all Faults for Future Reference
In cold weather, provide good drainage around the building to avoid water standing and freezing that may weaken the pointing. Record any repairs made for future reference, including the composition of mortar used, so that work carried out later can be done consistently.
Challenges of Struck Pointing
Some challenges of doing a strike point are mentioned here,
- Requires skilled craftsmanship to maintain a consistent angle and depth, especially on large or uneven wall surfaces.
- Precision control is crucial when working on unsymmetrical or historic masonry structures.
- Weather conditions impact quality. Hot weather causes mortar to dry too quickly, affecting shape and bond. Cold weather slows setting, increasing the risk of freeze damage.
- Restoration work demands extra effort to match existing mortar colour and texture, often needing several test batches.
- Timing must be precise. Early striking results in smearing and blurred joints. Late striking leads to loss of clean joint lines.
- Overhead or ceiling pointing presents ergonomic issues, affecting workmanship quality.
- Sloped joints may attract grime and pollution, requiring more frequent cleaning in urban environments.
Conclusion
Struck pointing is not merely a cosmetic finishing; it serves as a critical function in prolonging the life and performance of a wall of masonry. Not only does its sloping design contribute aesthetic appeal, but it also actively helps protect against moisture. Properly executed with proper material and technique, it provides years of no-maintenance protection. Whether building a new residence or renovating an existing one, struck pointing is still a common-sense, dependable option.
Seeking professionals to make your walls strong and last for years? Count on Brick & Bolt, India’s most trusted construction firm, for top-notch masonry services. Get in touch with us today to begin.

